

How to fit side bars to your VW T5 or VW T6 Transporter
How to fit side bars to your VW T5 or VW T6 Transporter
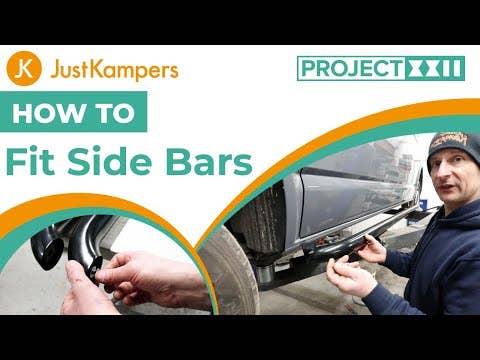
We show you how simple it is to fit side bars to your VW T5, T5.1, T6 and T6.1 Transporter. To find out more about our sidebars visit visit our VW T5 - T6 side bars page
How to fit a set of side bars to your VW Transporter
Here’s a quick guide to installed a set of side bars to your Volkswagen Transporter. Whether you’re looking to protect the sides of your van, or just want an aesthetic upgrade, you’ll be able to fit a pair of side bars in no time.
This guide will walk you through the steps for fitting side bars to your vehicle, and have your T5 or T6 looking totally different in no time.
Step One: Getting everything ready
Before you start, you’ll need to gather up all the tools that you’ll need, so that everything’s in easy reach. There’s nothing worse than having to stop half way through a project to find the right size socket!
The tools you’ll need are: a 16mm spanner, a 13mm spanner, an 8mm and a 10mm socket, a pair of safety glasses, and additional tools for removing plastic parts of your Transporter’s undertray.
If you’ve got your side bars from Just Kampers, they’ll come with the fixings needed to fit them, but you may need to track down some nuts, bolts, and washers if you’ve got a set of side bars which don’t include them.
Step Two: Preparing your Transporter
Carefully lift your van up onto axle stands, taking sure to use the correct jacking points underneath your Transporter and a jack which can support the weight of your vehicle.
Once that’s done, you’ll need to access the underside of the van to remove the fixings from the sides of the underbelly pan, using your sockets. Make sure you set the pan’s securing bolts aside for later, so you know where they are!
You don’t need to remove the whole pan, just removing the side bolts will give you access to the area you’ll need for fitting the side bar mounting brackets.
Step Three: Installing the mounting brackets
Take your four mounting brackets and sort your front brackets from the rear, and the nearside (left) from the offside (right).
When it comes time to fit the relevant bracket to the correct place on the vehicle, you’ll only need to lift the plastic pan away from the underside of your vehicle, so that you can get to the mounting points for the brackets.
At the front of your Transporter you’ll find a pair of rubber bungs on either side of the vehicle, which you’ll need to remove so that you can install your mounting bracket.
Line up the holes for the fixings, and then slot the bolt through, followed by the fixing plate.
Push the bracket up in place over the bolts, and then secure it with the plain washer, locking washer, and then the nut. Do them up hand tight for now, so that they’re held in place. You’ll need to go back and tighten them up properly with your socket set later, however.
Step Four: Fitting the Side Bars
Now you’re ready to fit the side bars to the mounting brackets. Before you do so, it’s a good idea to test the thread on the bolts from your fitting kit on the side bars themselves, to make sure that they fit properly. It’s much easier to test this out now than to find out you’ve got your bolts mixed up during the actual installation!
All you need to do now is to rest the side bars on the ground and align them with the mounting brackets, then slide the side bars into position, ensuring they cover the brackets evenly.
You can adjust the side bars slightly from side to side, to make sure they’re looking exactly how you want them.
Once you’re happy with how the side bars are sitting, you’ll just need to tighten the fixing bolts holding the mounting brackets to your vehicle, and then secure the bolts securing the side bars to the mounting brackets.
It’s important to use the correct tools to make sure that these are properly secured, and won’t shake loose as you drive.
Step Five: Final adjustments
You may find that you need to cut some small holes or notches into the plastic under tray to ensure that it fits correctly over the mounting brackets, but if you’re careful and only cut away what you need to, it won’t cause any problems.
With all of this done, you can apply some underseal or rust prevention such as nuxudol or Waxoyl to prevent the underside of your Transporter from being damaged by water, mud, and general road grime.
Once that’s all done you can carefully lower your van back to the ground, and allow the underseal some time to dry and set if you’ve applied any.
And that’s it, you’re done!
We hope you found this guide helpful, and hope you enjoy your new side bars!


Did you know that our colleagues at Just Kampers Insurance have been offering specialist vehicle insurance since 1998?You can get a great deal on insurance for a huge range of vehicles, from daily drivers to treasured campervans, and everything in between. Just Kampers Insurance works with a huge network of insurers to find you the best deals, and they're so confident that they'll send you a £50 Just Kampers gift voucher if they can't beat your like-for-like quote!
Insuring your vehicle with Just Kampers Insurance also gets you a 10% discount on orders here at Just Kampers, which could save you even more money!
Get an Online Insurance Quote Today
Get an Insurance Quote
Get an indicative quote from Just Kampers Insurance with the form below, and get an idea of how much you could save with Just Kampers. There's only a handful of questions, and it'll only take around a minute.
We'll be able to give you a more accurate quote and a better price on the Just Kampers Insurance website, or over the phone when you call us on 01256 444546
