
After the recent trio of storms which battered the UK at the end of February 2022, we're hoping you're all safe and well, and that your loved ones, homes, cars and gardens made it through without any major damage.
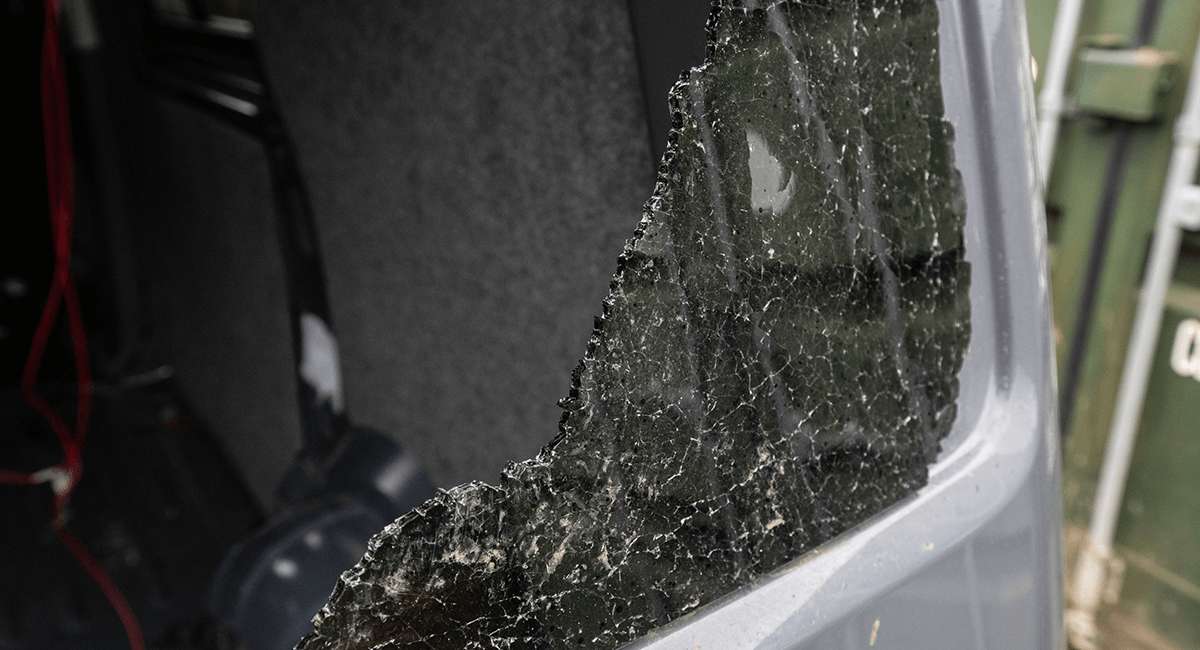
We're fortunate that the JK Team got through the recent string of storms relatively unscathed, with no injuries or major damage to our homes. Our cars, too, made it through with no incident - except for Steve Gosling's VW T6.1, which had it's rear window smashed by... something!
Whatever crashed into the back window on Steve's van didn't hang around to be identified after it broke the window, but it did leave some impressive damage in its wake.
Fortunately, Steve works here at JK HQ where we've got a warehouse full of VW Transporter windows and window seals, as well as an on-site workshop!

After a tentative drive into JK HQ on the Monday morning after the storms, Steve had a chat with our resident mechanic 'Workshop Mark', who set about getting it fixed up for him - hopefully a new window would be fitted and the bond set enough for him to be able to drive home again at the end of the day!
The rear window we'll be installing is this one: VW T6 Rear Tailgate Window Glass (Dark Tint)
The right tools for the job
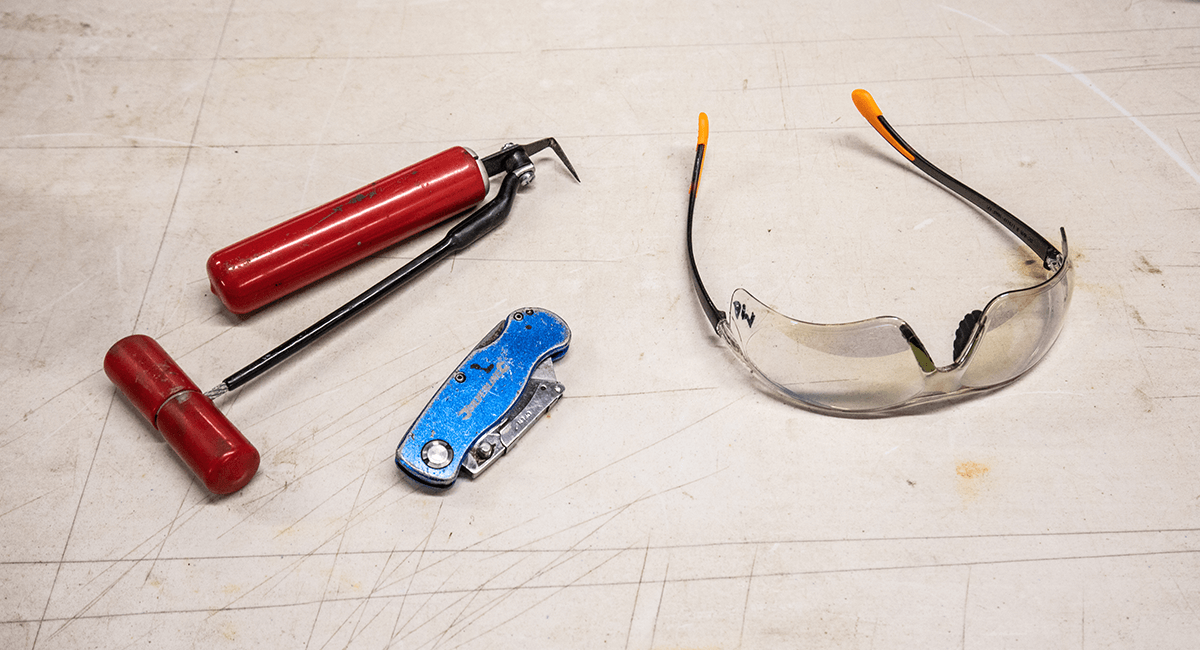
Removing the remnants of a broken window and fitting new glass is fairly straight forward, especially if you've got as much experience as Mark, but experience and confidence are no substitute for the right tools and safety gear.
Mark used a pair of safety goggles and a set of tough gloves for removing the glass fragments from the window frame, and a set of rubber gloves when installing the new window.
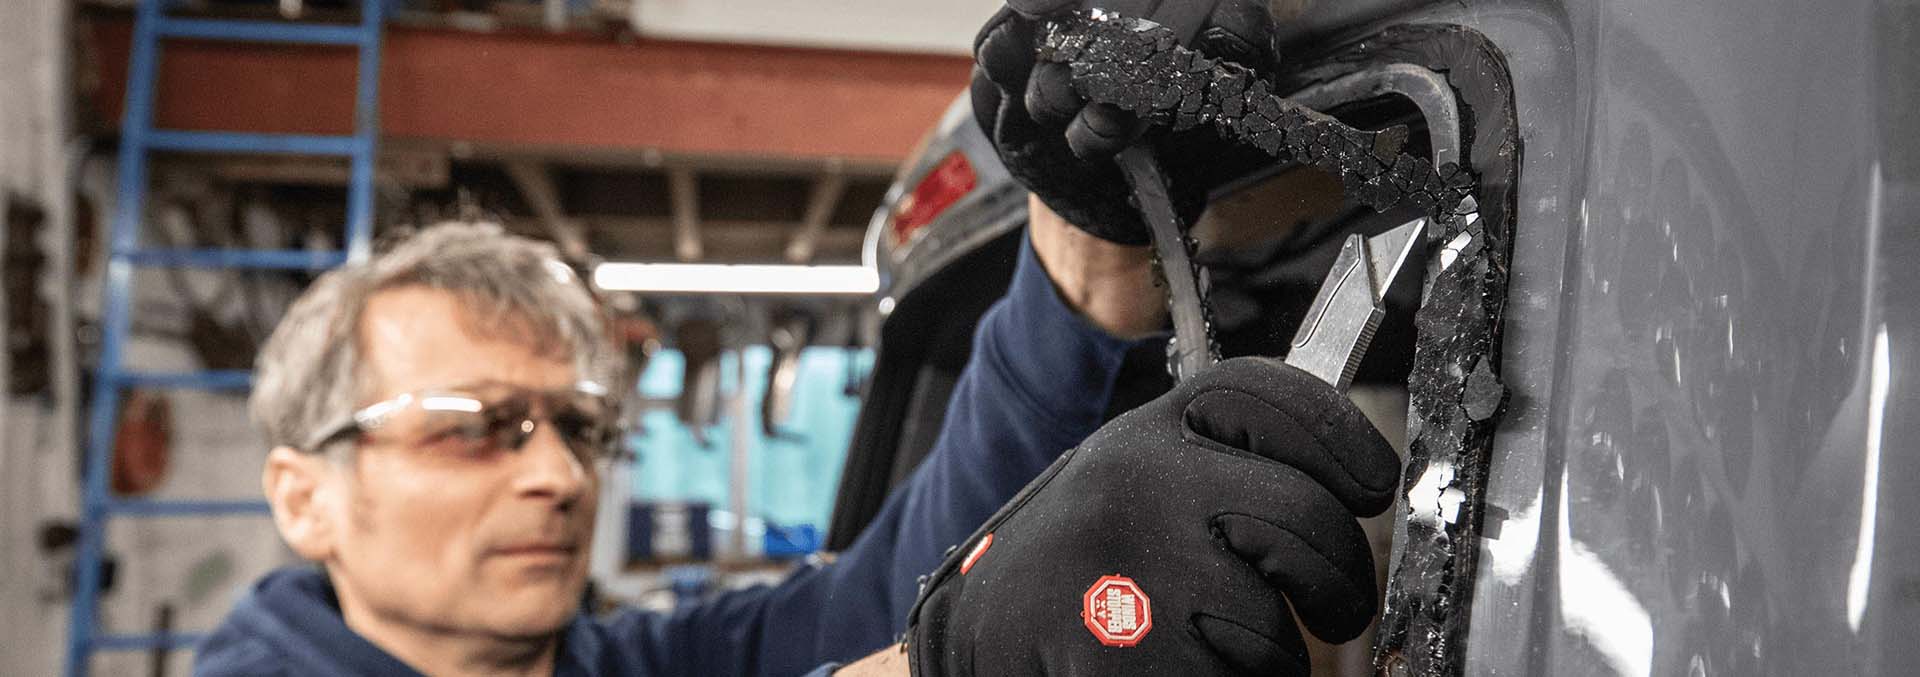
He also used a stanley knife to remove the old seal and glass parts from the window, as the special bonded window remover tool he grabbed wouldn't work on a shattered window, since it needs to be able to push against the glass as one whole piece.
First things first...
The first step for our resident JK mechanic, Mark, was to push in the rest of the glass which was still clinging to the edges of the broken window.
Steve had already gotten rid of a lot of it before moving the van, and swept it all up to ensure he wasn't leaving any bits of broken glass behind to injure people, animals, or tyres!
Mark used a pair of tough gloves to carefully make sure that all of the glass was removed before heading onto the next step.


Out with the old
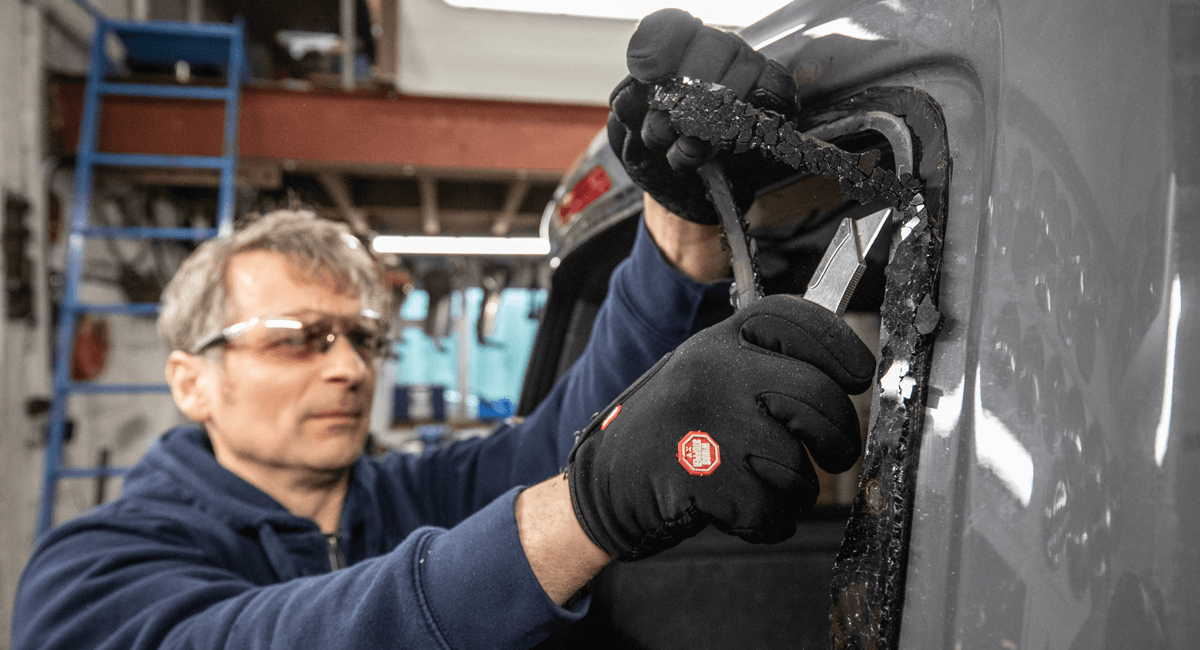
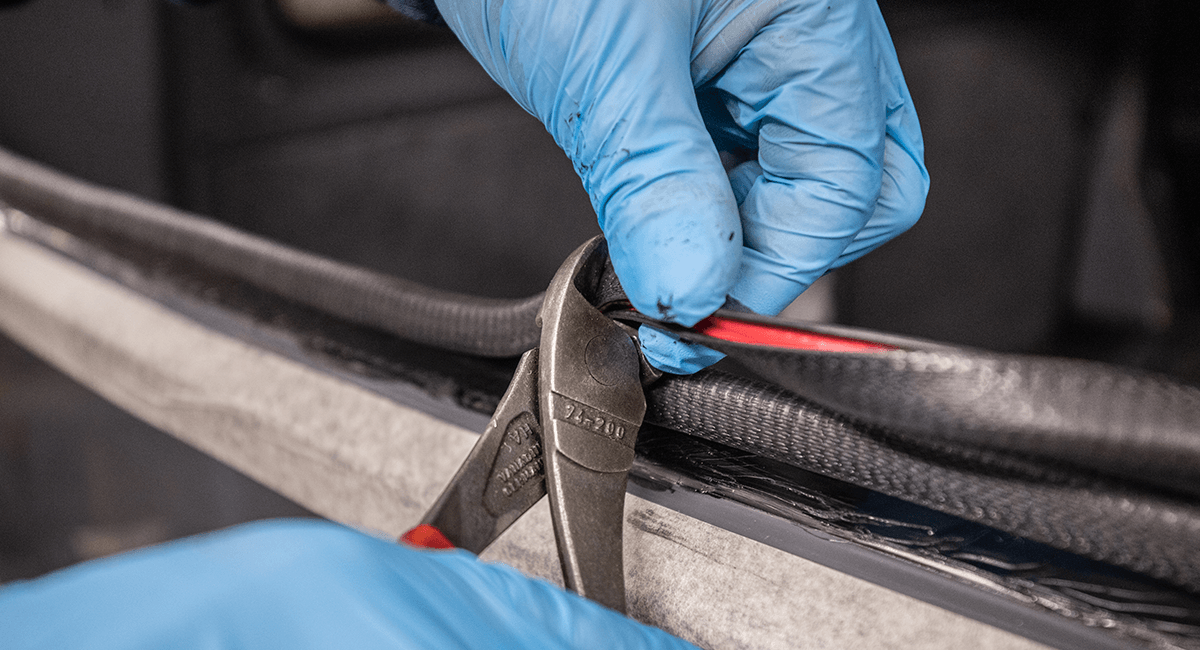
With the T6.1 free of loose glass shards, it was time for Mark to carefully cut away the old sealant, which he did using a sharp knife and a lot of patience.
There was still broken glass present here, but it was firmly stuck to the old sealant and wouldn't fall out onto the floor. Mark kept his reinforced gloves on for this, trading a bit of mobility in his fingers for keeping those fingers from getting shredded!
Mark also cut out the old window trim seal, to give a smooth, clear surface for new sealant and trim to be added in when the new window was ready to be fitted.
Suck it up
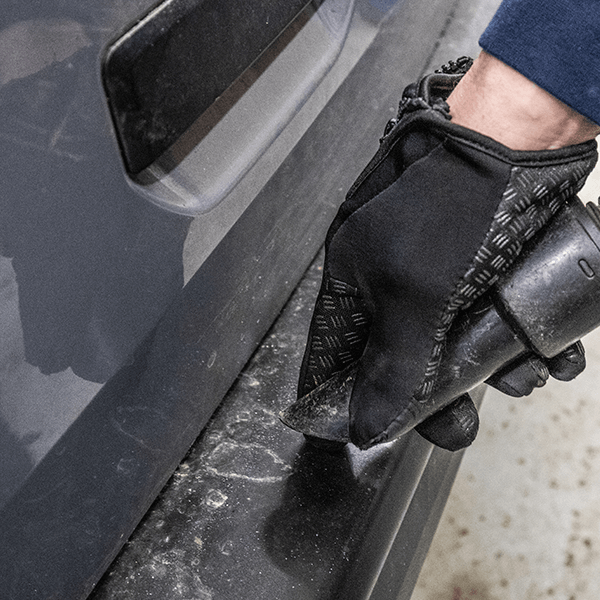
With all the glass shards from the broken window largely in one place, and any shards from the old sealant having already fallen out or being put securely in the bin, Mark got the workshop vacuum cleaner out and methodically cleared up all the bits and pieces of glass on the inside and outside of the vehicle, as well as on the floor.
It was a good excuse to give the workshop a bit of a sweep and a hoover, which is the start of our spring cleaning here at JK HQ!
Again, Steve had already cleaned up most of the glass inside the van before he ventured in to JK HQ to get it fixed, but a proper hoovering in better light couldn't do any harm.
Although the area was now clear of broken glass, Mark didn't let his guard down, and kept his safety gear on while he carefully carried out the rest of the jobs.
In with the new
Now that the edges around the window were clear of broken glass, the previous trim seal and old all the sealant, it was time to get ready to install the new window glass.
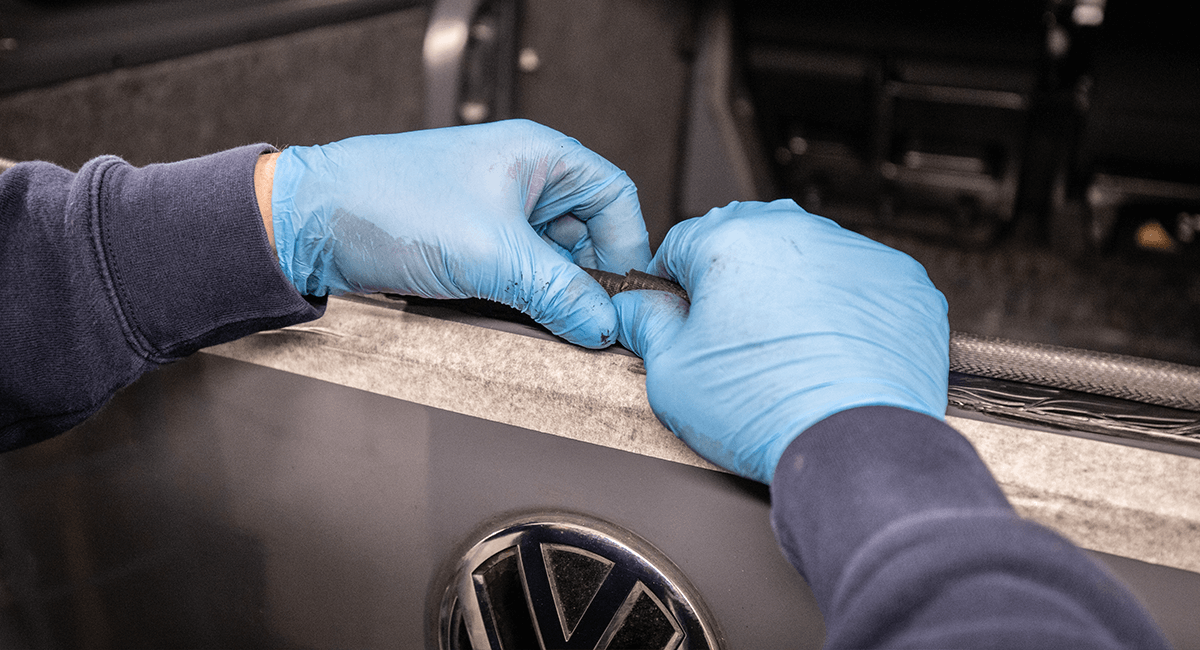
Mark fitted a new window trim seal to the edges of the rear window aperture, to ensure that the glass would sit in the right place and not be damaged or leak once it was installed. He carefully fitted the trim around the outside edge, and then cut the edges to ensure that they met properly in the middle.
This is the seal he used for the job: Window Interior Edge Trim VW T6 & T6.1 (Tailgate Window)
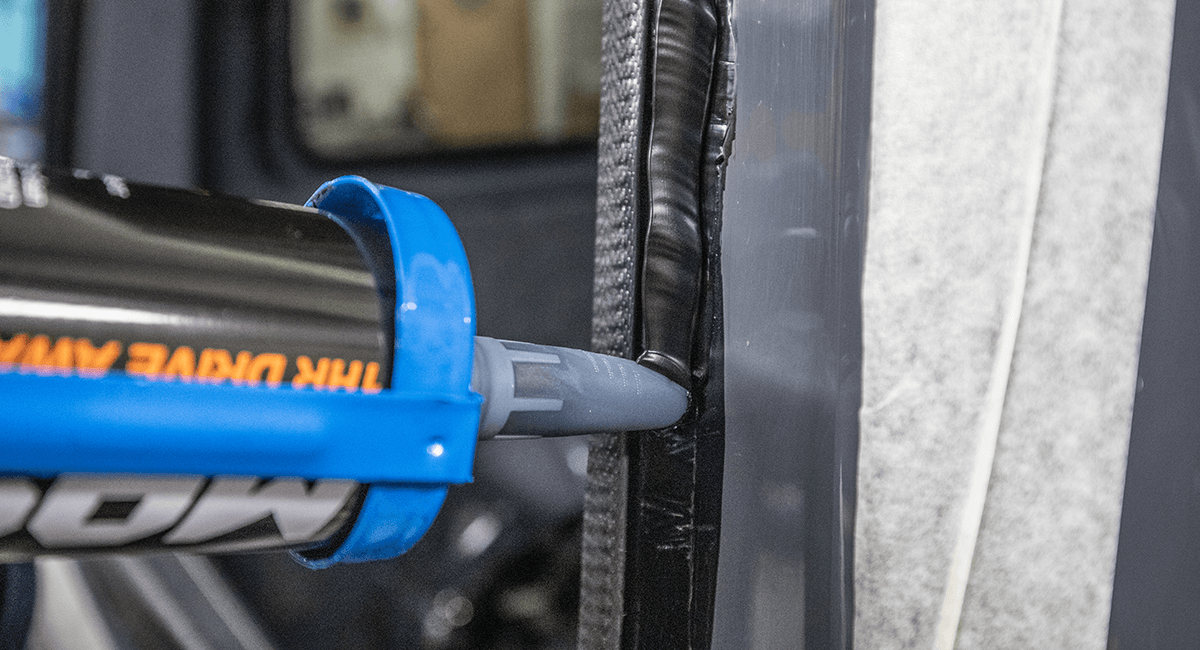
With this in place, he then sealed the edges with a tube of sealant from one of our window bonding kits.
While this was setting, Mark prepped both the glass itself and the window aperture for fitting the new rear window.
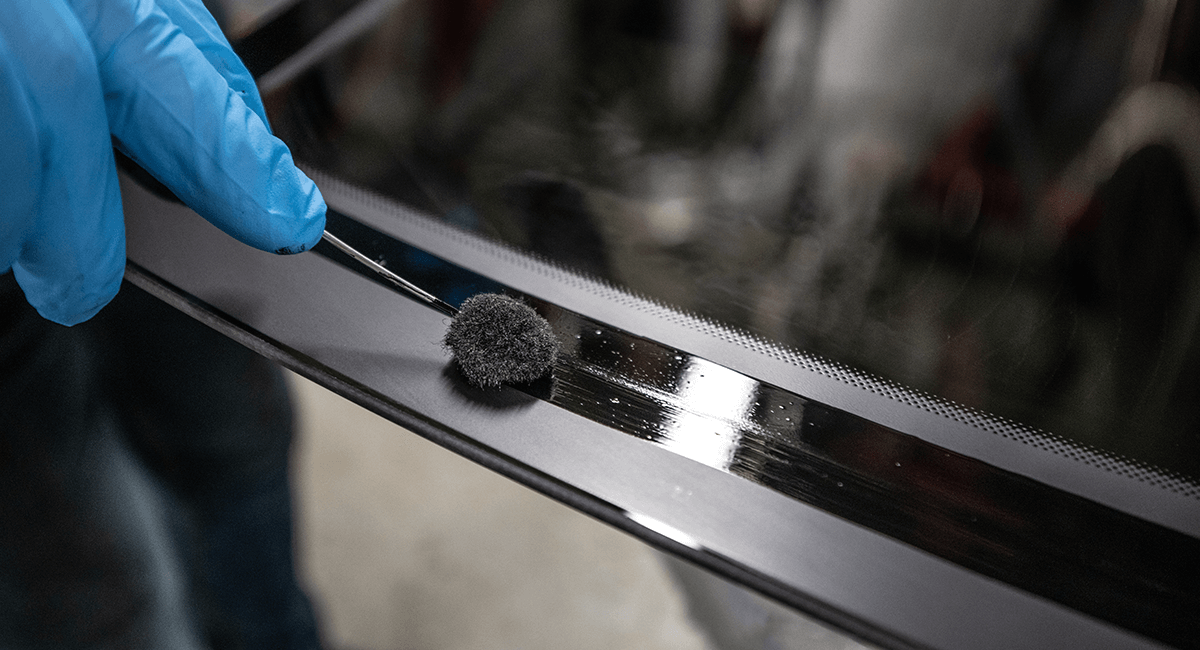
First he used the cleansing wipes from the bonding kit to clean up the new window, to make sure there was nothing on the window to stop it from being properly fitted and forming a proper seal.
When everything was ready, he used a felt applicator to evenly spread a bonding agent on the window glass, and the edge of the tailgate to ensure they'd stick together and bond properly.
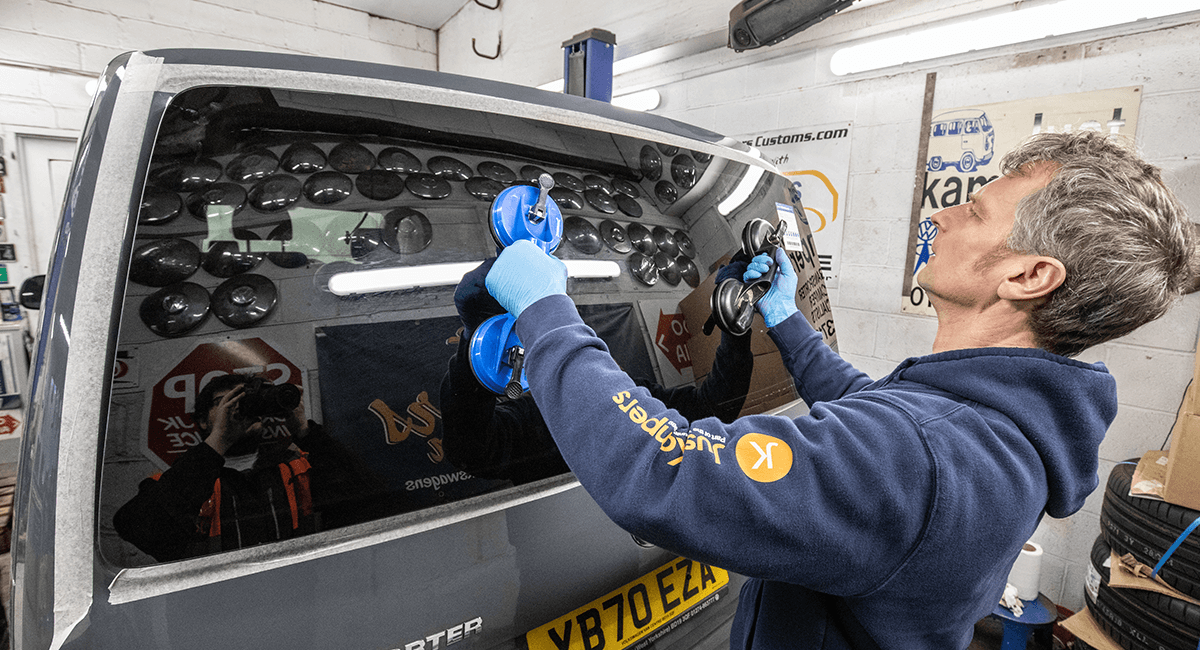
Mark's got a handle on it
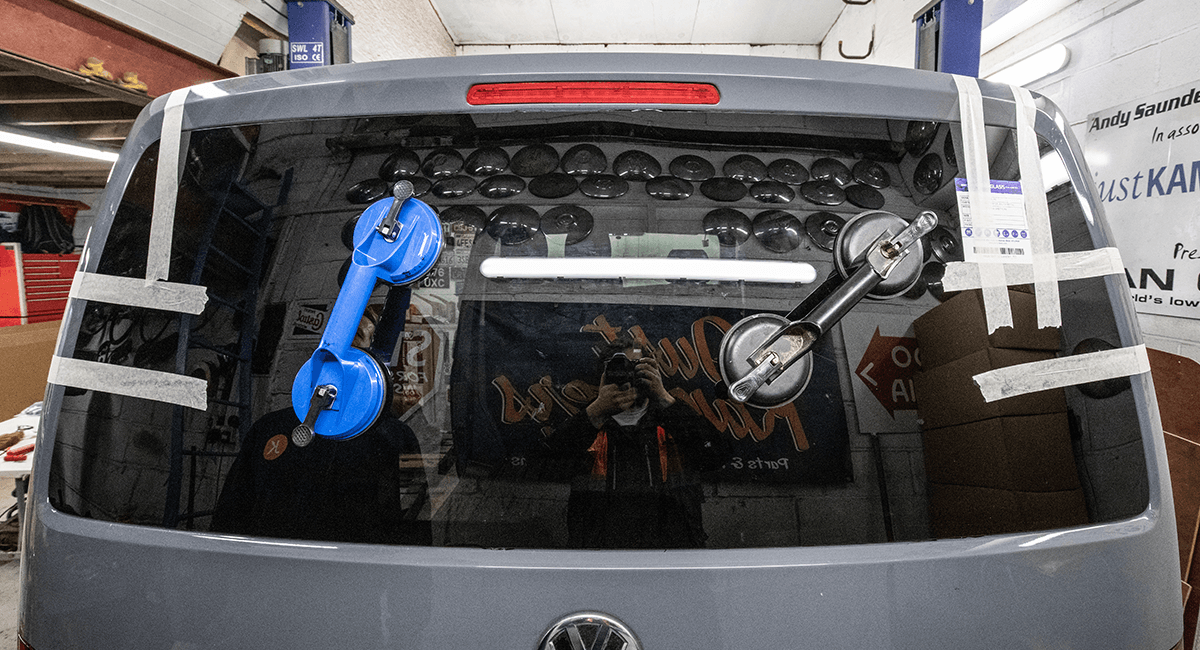
With the bonding agent in place on both the van and the window, it was time to fit the window! Mark used a pair suction handles to lift the glass in place and secure it properly, ensuring that the bonding agent was married up and sealing properly.
This is the tool which he used: Double Suction Pad for Lifting & Installing Glass
When he was sure that the bond had taken, he used some tape to hole the window in place, took a step back and admired his work!
What we used:
Here are the products we used to replace the shattered VW T6.1 window with a new one, including the window tool and bonding kit.

 VW T6 2015–On")

")


Jobs a good'un!
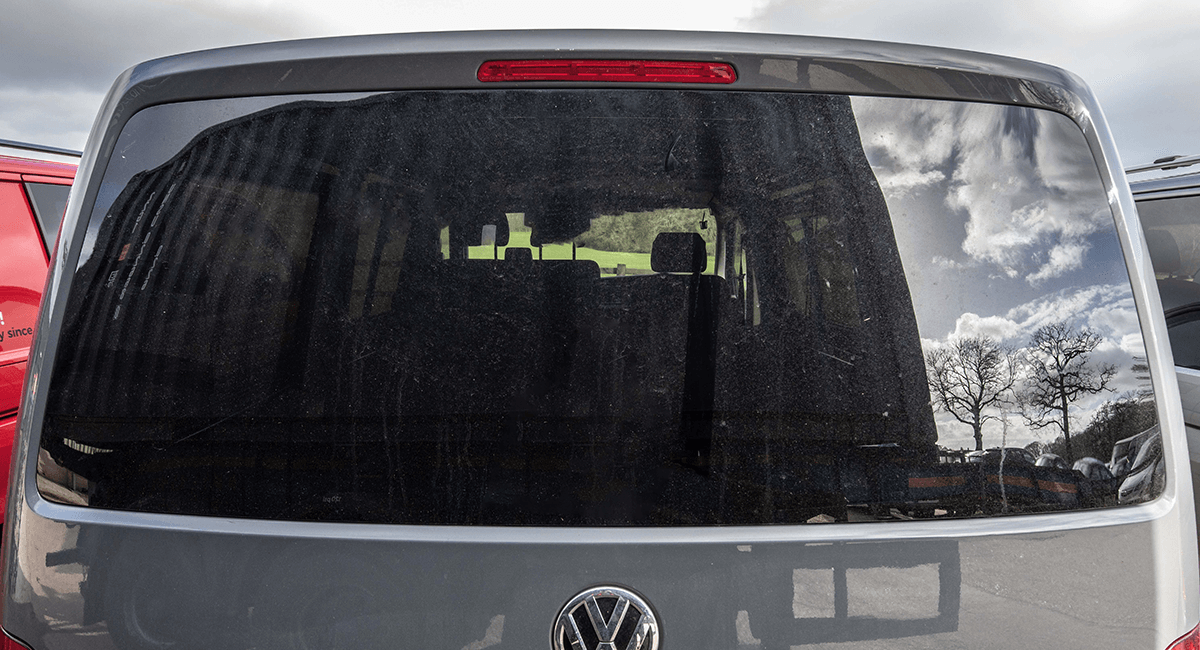
We're pleased to report that the window replacement was a total success, and, despite the cold, Steve was able to drive his Transporter home at the end of the day with the window staying firmly in place.
We hope you haven't had to replace your rear window - or any other windows - due to the recent storms, but if you've got to take the job on in the future we hope this guide will be helpful!