
The JK Team have taken on one of our biggest projects yet! We’ve given ourselves the challenge of completely converting and transforming a regular VW T6.1 panel van, into a pristine camper! Project 22 is the name; we are completely converting a bog-standard T6 into a high-spec campervan and doing it all using our own products! On top of that, we are also filming and documenting what we are doing, to build up a bucket of “how to” videos.

From the very beginning…
The van is owned by our very own Stephen Gosling, who is our Marketing Director, the conversion project began back in January 2022. Our Project 22 van is a Starline model with a 102 hp engine; it’s a short wheelbase, manual panel van, clothed in a deep grey paint named ‘Pure Grey’.
How is Project 22 looking at the moment?
Project 22 is still very much in progress. It’s been subject to quite a few modifications, but there’s still much of the journey to complete!
So far, we’ve removed the bulkhead, fitted windows, sidebars, installed roof bars, sound deadened and professionally insulated the vehicle.
All these conversions have been documented on our YouTube Channel, with in-depth video guides on how to carry out the work yourself. Within the description of each video, we’ve listed the products, with links, that we’ve used and their corresponding part numbers. In addition, we’ve taken the time to list all the tools that you would need to press on with the job.


We did it!
All the work so far has been carried out by our very own mechanic Mark. He’s currently restoring a Ford Sierra Cosworth. He really knows his stuff and it’s great to have him on board. Mechanic Mark, also known as Mark B, is not to be confused with Mark R, the Mark who founded Just Kampers back in 1989. The videos that we’ve produced, all feature Mark describing exactly what he’s doing, as he’s doing it. It’s a really hands on approach, which means that you get every step of the process explained.
All the modifications have been carried out in our workshop at JK HQ, just around the back of the warehouse. We have a workshop here at JK, which we all have the opportunity to use I when we need it, which is a great facility to have at a company like this! We did actually start off as a workshop business specialising in repairing and restoring old VW campers. Back in 1991 the direction changed as we were breaking old VW’s in order to source parts to complete repairs and restorations, which led to into manufacturing and selling parts, which is what we do now!

The workshop that we use now has been used in the past by other well-known car enthusiasts, did you know that some early episodes of Wheeler Dealers used to filmed that the current JK HQ?
The videos that we’ve filmed and produced on our YouTube channel, may be specialised to the T6.1 specifically, but all the information within them is useful for everybody. As an example, the Window Fitting Guide we’ve put together, is applicable to almost every panel van window conversion. The tools needed will be the same, the method will be the same, the only difference will be the parts required as you’d need different windows for a different vehicle.
Test trails of new and existing parts
The work that we’ve done wasn’t just to show off the range available from JK, but to better understand the products that we sell to our customers. We can do better than to just supply you with windows or panels, and say that they can be fitted, job done.
All parts are unique; if we better understand our products, then we can better inform our customers as we go. The descriptions will be clearer and more developed, the fitting instructions will be more in-depth, and our customers will be happier as a result. It’s no good guessing, guessing leads to taking risks, and taking risks leads to mistakes… no one likes admitting that they’ve made a hole in their van too large for the window!
This project has also led us to expand our range of products for 2022. The process of converting a completely stock van has meant that we’ve been able to identify products that we’ve previously missed out on selling.
Step by step
If you’re interested in looking at the videos we’ve filmed to document our Project 22 conversion, please follow the link here!
We’re still converting Project 22, and so we will be updating the video series regularly.

What we’ve done so far: To remove the ply lining
The previous dealership had installed some wooden panelling to the inside of the Project 22 van, so we had to remove this. We used a battery-operated drill to remove the screws and a knife to separate the wheel arch box from the wall, where it had been glued with sealant.
We did the same to remove the side panels. We carefully lifted the ply panel away from the vehicle and followed on by repeating the same process with the other side panels. Underneath the ply lining, there was some metal panels. To remove them, we used an allen key to take out the bolts. The tailgate was trickier. We repeated the processes but came up against a handle and the tailgate switch. Remove them carefully and disconnect the switch from the power and then everything comes away. Don’t forget to remove the floor and roof panels!
All the wooden and metal panels are removed in order to free up access to the raw van structure, which you’ll need to see in order to effectively fit cut holes and fit the windows.

Let’s take out the bulkhead:
We took out all the nuts from the rear of the bulkhead. We removed the top section first, and followed with the bottom half. We removed all the fixings. To remove the fixings in the roof, we gained access by removing the plastic trim, whilst sitting in the cab section. We removed the trim using a flathead screwdriver.
Useful tip: To prevent the top section falling straight off once all nuts are removed, leave one remaining in the back and remove that last, when you have control of the bulkhead.
We then repeated this to remove the bottom half.Once the bulkhead was gone, we were left with a metal seam, which effectively acts as a bracket for the bulkhead; we had to remove this with a grinder. Before this we had to remove some bits to protect them, and mask other parts that we couldn’t remove. This was to protect them from flying sparks and grinder debris.
To access the rest of the seam we had to remove the seats. To remove the bench seat, we had to carefully take out the fuse box underneath. To remove the driver’s seat, we had to take off the handbrake cover and then disconnect the electrical components underneath the driver’s seat. Once this was done, we could remove the seatbelts and the plastic trim from the A pillars. Lastly, we rolled up the mats from the floor to fully gain access to the seam section.
We could finally grind away the seam!
Useful tip: We masked up other areas to protect it from the grinder particles released as a result of grinding, this is because they’re corrosive and they will eat into the expensive paint on your vehicle.

We also fitted our JK Windows:
As a general rule, this is the rough process you should undertake to fit a window into your bus or van.
From the inside of the vehicle, we were able to see the structure of the vehicle wall. This gave us an area where you’d think a window would organically fit. For the offside front side window, we lined out our area using sharpie, and drew a straight line across the pillar that stands between the panels. We then drew, where we would need to drill holes.
Between that area, we used some cardboard to create a template that would be used to demonstrate where the corners of the panel hole need to be. Once we had drawn that, we cut it and lined it up to the drill holes on the outside, and traced the template so that we could see where the hole would present itself on the outside.
Drilling holes left sharp edges on the outside of the vehicle, so we removed the burrs on them, to prevent injury. Then we masked up the area where the window would sit, with masking tape and cardboard. This is to protect your paint as the grinder debris is corrosive.
From the inside, we used a grinder to cut the straight edges first and then the corners. We then removed the masking from the outside and using the sharpie guides from earlier, cut the hole out completely with a jig-saw. We then re-masked the area with tape and carboard so that we could smooth over those rough edges with an angle grinder. Remember to keep masking the areas off to protect your paint from grinder debris!!
Here are a couple of products we used for the job:

 Offside (Right) VW T5 & T6 SWB")


We painted the bare metal edges to protect against corrosion and then laced the window apertures with some U-trim. We laid it out, followed it around and tapped it gently with a mallet, to secure it. Once we had done this all the way around, we cut the U-trim to the correct length. You can go around again with a mallet to seat the trim properly.
On the outside of the van, we roughed up the area just outside the trim, with a little bit of sandpaper. We double-checked the windows for damage and then used suction mounted handles to move the window around with ease.
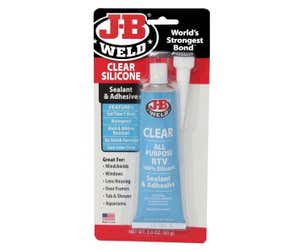
We cleaned the edges of the window and did the same to the corresponding parts on the vehicle. We ran the primer around the glass where the glue was due to go and the area we sanded with primer. We let the primer go touch-dry and applied the master bond to the vehicle, where the primer was applied. A continuous bead of sealer was applied all the way around the window edge, then we lined the window up. The top edge was applied first and then pressure was applied all around. The master starts to cure and ‘go-off’ within an hour or two but we left the window to bond for a whole day at least.
We also sell the caulking gun and master-bond that we used to bond the window to the panel.


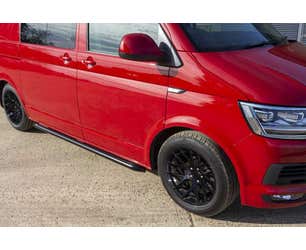
We then fitted sidebars:
We removed the plastic undertrays but that was purely so that the camera could see what was happening for the filming! The plastic bungs under the sill were removed, so we could apply the fixings for the sidebar frame. We did that and then fed the bracket up onto the fixings and secured them with the washers and nuts.
We then fixed the sidebars to the bracket using the bolts and washers provided.
As we went around, we only tightened the bolts enough for the threads to start, later we tightened all the relevant fixings to ensure their stability and structure. After this, we cut a small mouse hole away from the under shield, so there was no unnecessary pressure between the bracket and the under shield. Lastly, we used an underbody wax to protect all our fixings from weather and corrosion.
The sidebars that we fitted are also sold on our website:


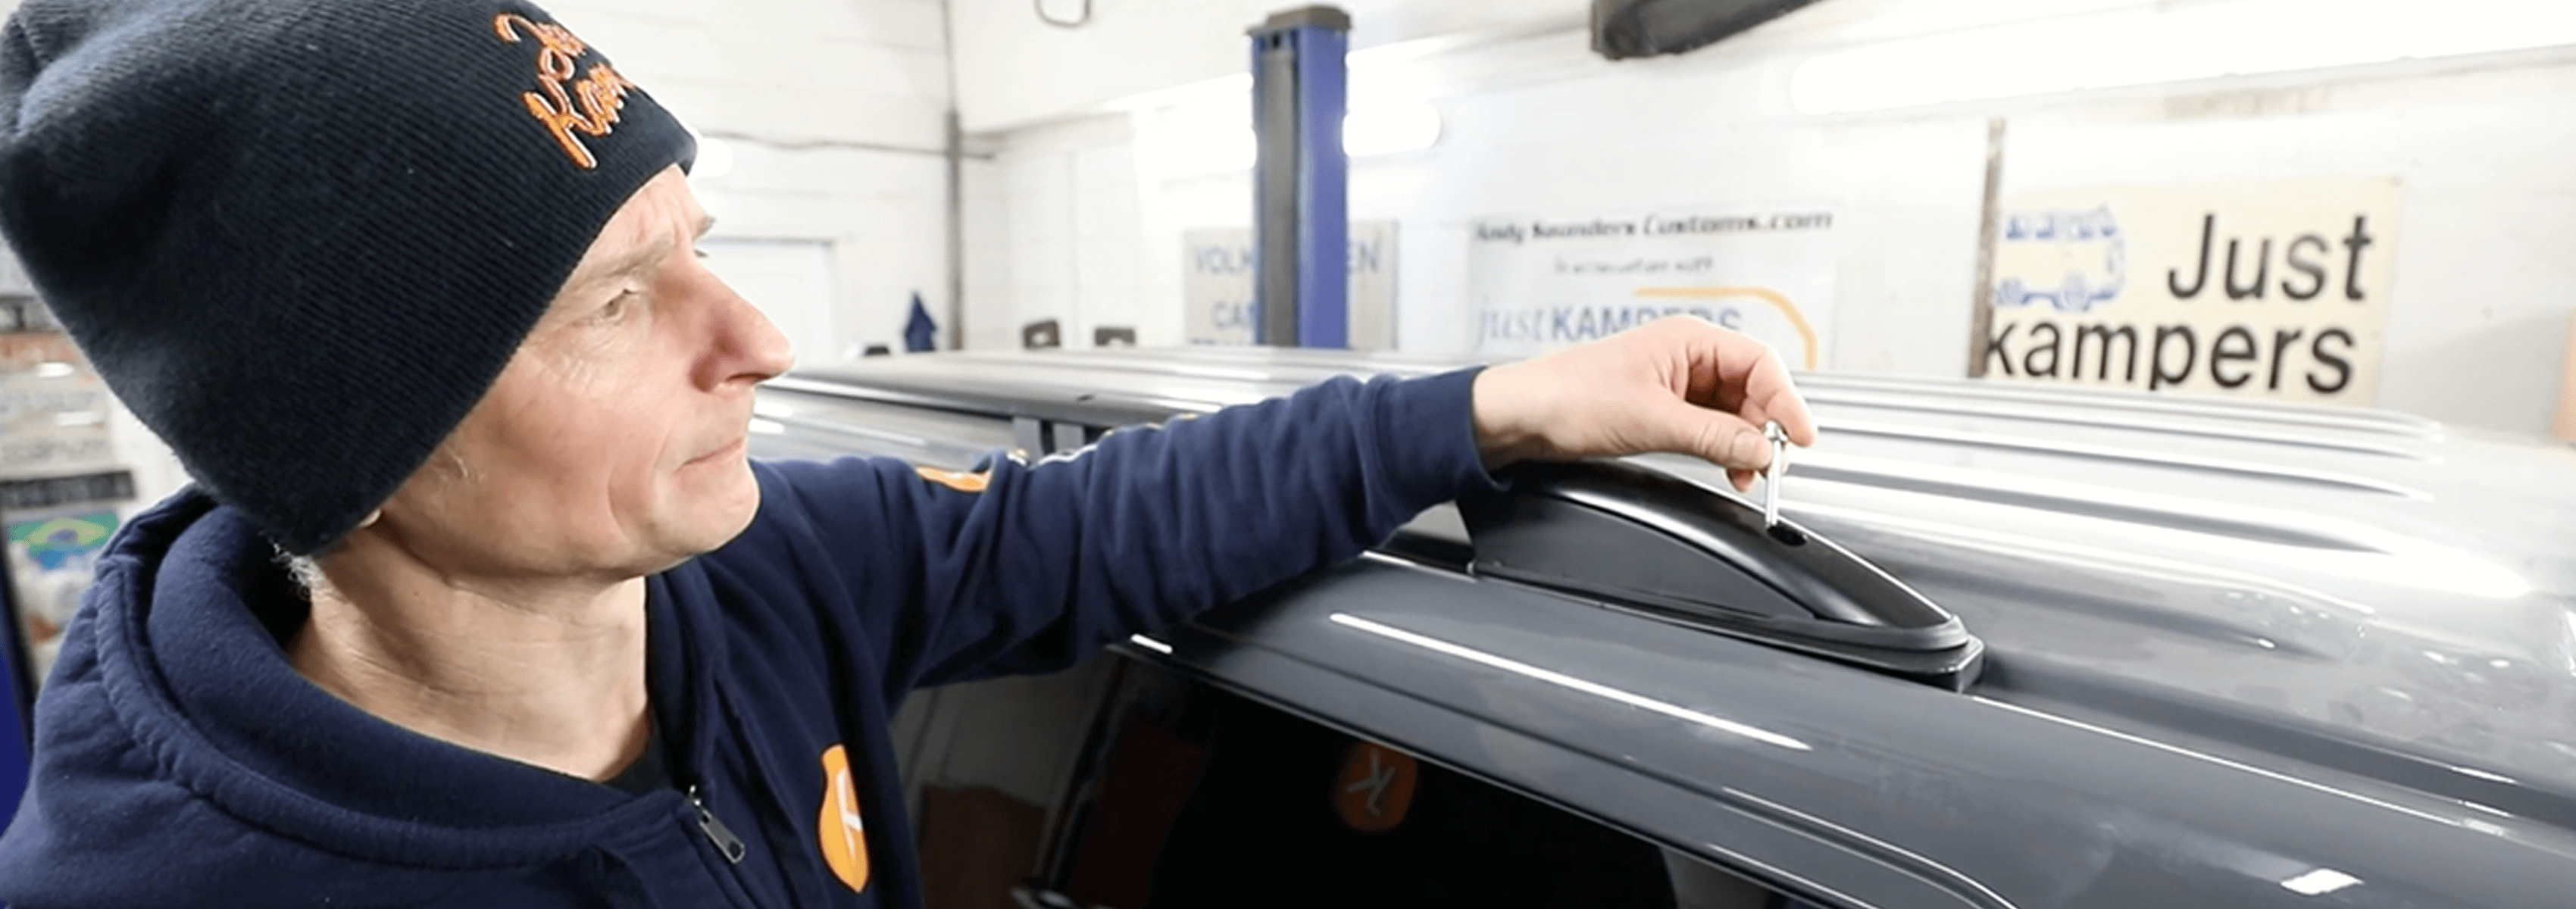
Then we fitted our roof bars:
If you look at a T6 from above, you’ll see a row of screw bungs that run along channels on the right and left of the roof. We removed the one from the front and two from the back. Silicone sealant was applied around the holes and the bolt threads to prevent water getting in.
We then applied the spacers over those areas to provide a flat surface for the roof bars to sit on. To apply the gaskets, turn the roof bar upside down and push it onto the holders within the bracket plate. The centre gasket was easier to place on the vehicle, rather than the roof bar fixing point, as it didn’t stay on the roof bar as it was lined up.
Once we lined the roof bar up, we dropped the bolts and washers down into the thread and tightened them up with an allen key. The rest of the bolt threads were started and we then went around and tightened them up firmly. Once tightened, we applied the blanking bungs, and did the same with the other side.
You can find the clear silicone sealant and the cross bars below:
-
 Black Aluminium Roof Bars (Short Wheelbase) With Cross Bars VW T5 VW T6
From £50.78 Regular Price £56.50
To £111.00 Regular Price £123.50
Sound deadening with Dynamats:
Steve literally drives the van hundreds of miles every week, to work and back. So we knew that we would need to dampen the noise in the van. We used Dynamat because they’re high quality products and very reliable. We measured the panels that we were applying it to. Wiped over the area with brake cleaner to free the surface to oil and debris and went ahead and cut the sound deadening to measure.
We lined it up, peeled the backing off and applied it to the panel. Once stuck, we used a roller to properly lay it on the vehicle, working our way out from the centre. Gloves should be worn, as the dynamat is foil based and so edges can be sharp. The backing was peeled off, half at a time, like how you would apply a plaster! We then repeated this all over the vehicle.


You’ll see it shortly!
The JK Team and our vehicles will be attending various shows this year. We loved seeing everyone at Volksworld and we can’t wait to see everyone again. Shortly we’ll be hosting a Koffee & Kampers event at JK HQ. You’ll find out more information on that shortly, and we’ll see everyone at Wheels Day too! We’re not attending as an official stand, but if you see Project 22 or another JK car, then come say hi!
There’ll be constant updates to the Project 22 video series on YouTube, and you can follow the progress of the van via our YouTube Channel. If you subscribe and hit the bell notification button, then you’ll be in the know, when we upload new videos!
See you soon!