
Written by Mark Walker, originally published in VolksWorld magazine
Easy when you know how
Dropping the back of a Beetle is easy when you know how and how far to go.
So you have the front ride height all sorted on your Beetle, but have no idea where to start with the rear suspension? Or you know how to take it all apart, but are not entirely sure how many inches one spline will lower the car? Or whether you should move the inner or outer splines? Well, you’ve come to the right place then, because this guide will give you the answers to these questions, as well as a few tips we’ve learnt from experience on getting it right first time and not screwing everything up and ending up with a car that you either can’t drive, or is downright dangerous. Ready? Then let’s dive in.
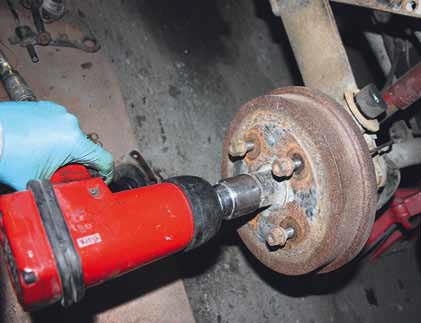 Image credit: Mark Walker
01 Before we start we need to discuss loosening the hand brake. You basically have two options here: either loosen the cables inside the car by removing the hand brake gaiter and backing off the 10mm locking nut and 10mm securing nut or, if you need to remove the brake drum for any other reason (such as changing drums in order to alter your wheel bolt pattern) then unhook the hand brake cable at the rear end and pull it completely out of the way. To do this, you will need to remove the split pin and loosen the 36mm nut holding the drum on. This can only be done with the rear wheels on the ground, and you will either need a heavy duty, air-powered impact gun, or a strong breaker bar and a cheater pipe. A ¾ inch drive is best here, as the nuts are done up to 216 ft.lbs of torque. Then loosen the wheel bolts (19mm socket if standard VW bolts).
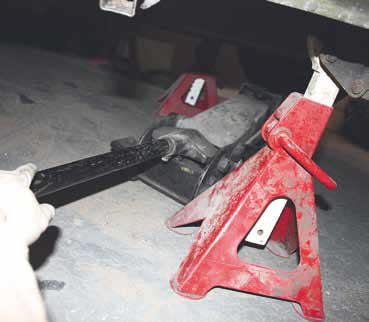 Image credit: Mark Walker
02 With the wheels and rear hub nuts loose, you can now jack up the rear of the car and secure it on two axle stands, either under the gearbox frame horns, or under the torsion tubes.
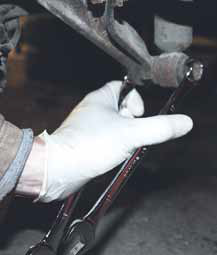 Image credit: Mark Walker03 If you are going for a mild drop (two or three inches), you should be okay with the standard shock absorber, providing it is still serviceable of course. If this is the case, you can just remove the lower mounting bolt, using a 17mm spanner on the nut and 19mm socket on the bolt end. With this done, push the shock absorber upwards into the compressed position to keep it out of the way. If you want to go lower, undo the upper bolt as well and remove the shock.
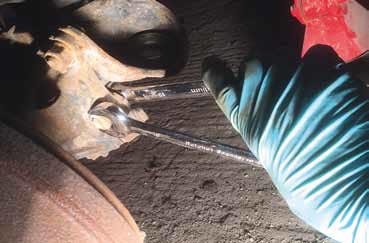 Image credit: Mark Walker
04 With the shock out of the way, turn your attention to the three 19mm bolts and nuts on each side, which hold the axle tube to the spring plate. You may need to chip off a load of mud, old gear oil and crud to access them, depending on the life your car has had. These can be awkward to remove, but you will need a breaker bar with a 19mm socket and a 19mm spanner. On the car pictured, where everything came undone easily, I got away with two spanners, loosened using a pistol grip, so as to avoid skinned knuckles. With the nuts removed, draw out the bolts and knock off the bump stop housing.
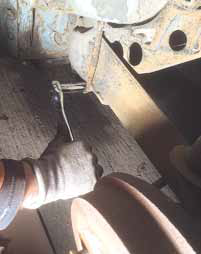 Image credit: Mark Walker05 Moving on to the torsion bar covers, you will need a 15mm socket, or cranked ring spanner. Clean up the bolt heads before removing them and prying off the torsion bar cover and rubber donut and setting aside.
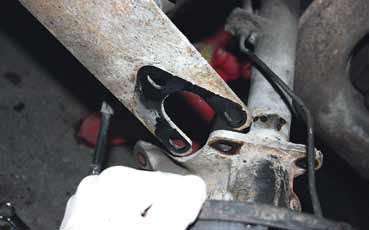 Image credit: Mark Walker
06 Now you can slide the axle tube back and out of the end of the spring plate. Be careful here! At this point you need to be mindful of the spring tension the spring plate is under in the stock position. If you inadvertently knock it off the stop at any point, it can easily break bones (I broke my thumb once doing this very job), so keep all parts of your body free as you do this!
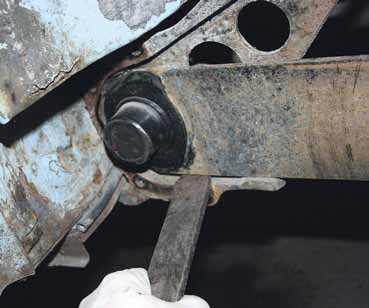 Image credit: Mark Walker
07 With the axle tube out of the way, take a pry bar and put it under the very forward part of the spring plate and pry it off the stop. Be warned, it will go with a bang. Again, I can’t stress how important it is to stay out of the way of the spring plate at this point. With the spring plate successfully off its stop, and all your digits intact, you can find the inclinometer/ angle finder to the spring plate and take a reading. On our car, the stock reading once it was off the stop was 21 degrees.
08 Okay, a word on degrees and what they equate to in inches. If you’re working in new money, then an inch is 25.4mm, okay? One outer spline will move the spring plate eight degrees, or 2.5 inches. From this, you will see that a change of four degrees equates to an inch of lowering. Want to drop the rear  Image credit: Mark Walkersuspension three inches? Then you need to use a combination of the inner and outer splines to achieve the required drop. Personally, I would rotate the rear two inner splines (five inches) and then raise it back up by one outer spline (two inches). On this car though we decided to keep it simple and go just two outer splines (four inches). A word of advice though – some cars will have more ‘sag’ in the torsion bars than others, so a two spline drop on one car may equate to more than four inches on another.
If you are going more than four inches, you will need to notch the spring plate; otherwise it will constantly bottom out on the upper stop. This means cutting a section out, as shown on the one in step 10. Make sure all cuts have a nice, gentle radius. You should also be away that lowering four inches or more will mean there is not enough toe adjustment on the end of the spring plate, so you will constantly be running in a toe-in state, leading to, at best, premature tyre wear. This is the reason people use extended spring plates, which help correct this issue.
 Image credit: Mark Walker
09 Using the above knowledge, write down the actual degrees in the stock location on the car you are working on and devise a plan to achieve the drop you want. With this in hand, make a datum point on the spring plate and the end of the torsion bar, either by filing a notch or by marking them with Tipp-ex, or a touch-up brush. This gives you the stock location to refer back to in case everything falls apart on you. The last thing you want to end up with is wonky rear suspension!
Next, gently pry the spring plate off the torsion bar, or remove the whole spring plate and torsion bar in one if turning on the inner splines. If it is a bit stuck, you may have to tap with a hammer on the end of the torsion bar, whilst using the pry bar with the other hand. Wear ear defenders to do this.
 Image credit: Mark Walker
10 With everything free and the angle finder still attached, you should be able to turn the spring plate by the correct number of inches/ degrees. If using new rubber bushes, don’t forget to install the inner one before you re-fit the spring plate, and make sure you apply plenty of rubber grease to stop it squeaking. Note: normal grease will cause the rubber to degrade.
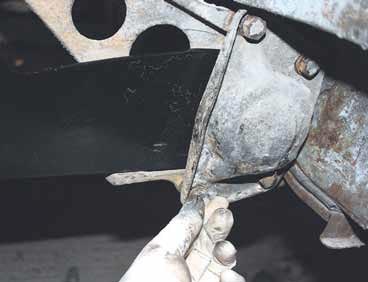 Image credit: Mark Walker
11 With everything set where you want it and the outer rubber bush in place, re-fit the torsion bar covers. Again, if you are using new bushes, it is prudent to coat them in rubber grease to stop squeaking, which will drive you to distraction. Coat the cover bolt threads with copper grease to avoid seizing and simply re-fit. Ha ha. In practice, this part can be a right pain to do, but I find using a special 15mm socket with a 15mm nut inside to push the bolts into the threads and get them started helps. Alternatively, try using two longer bolts in diagonal holes to draw the covers on, then start the other two and replace the longer ones for stock.
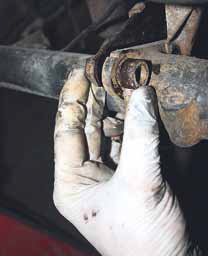 Image credit: Mark Walker12 Now slide the axle tube back in to the end of the spring plate and line up the holes. You will likely need to install and partially tighten the two rear-most bolts before you can re-fit the bump stop housing. Again, smear the bolt threads with copper grease before installation.
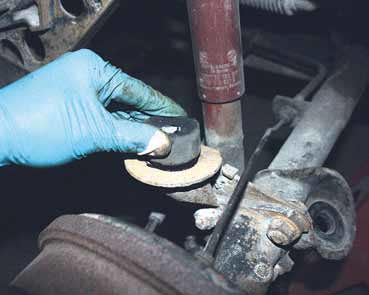 Image credit: Mark Walker
13 At this point, pull the rubber bum stop off the housing and cut it down to approximately half its size, using a hacksaw, before re-fitting.
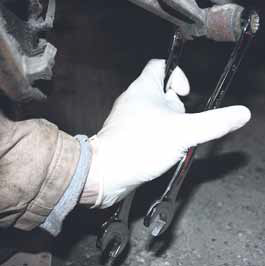 Image credit: Mark Walker14 With the axle tube installed and the bolts tightened, you can now re-attach the shock absorber with the original bolts. Again, copper grease on the threads will make life easier in the future.
 Image credit: Mark Walker
15 Push the hand brake cable back through the back plate and wiggle the securing clip into position. It’s very fiddly to get it into the correct position and start the 13mm bolt into the back plate but, with this done and a week’s worth of cursing off your chest, you can hook the end of the hand brake cable back onto the lever attached to the trailing brake shoe. It’s worth doing a visual inspection of the rear brakes whilst it’s all apart – look for any moisture or oiliness, which could be a sign of a weeping brake cylinder or hub oil seal. It makes sense to do any jobs like that while it’s all apart.
 Image credit: Mark Walker
16 Once you’re happy with everything, slide the drum back onto the splines and wind the 36mm castle nut on until hand tight. You can now re-adjust the brakes using the star adjusters until there’s very light drag. Wait until the car is on the ground to torque up the hub nuts to 217ft.lbs. A huge amount of force is required to do this, so go carefully, and if you miss the split pin hole, tighten it round to the next one, do not loosen it. On the car pictured, we found it necessary to fit stock wheels to do this, then swapped to the Cosmics once the split pin was in place.
 Image credit: Mark Walker
17 You can now re-fit your choice of wheels and lower the car to the ground. A final piece of advice here: check the length of the supplied wheel bolts before fitting (this is ideally checked by bolting a wheel to a drum when the drum is off the car). Those supplied with the aftermarket wheels we used were a hair too long, so could have messed up our brake internals if we’d driven with them like that. Better to check and then shorten (better still, replace) with the correct length bolts.
With the wheels fitted and the car lowered to the ground, tighten the wheel bolts and you are good to go. Be aware that the rear suspension will settle a bit more once the car is used. Finish.
 Image credit: Mark Walker

