A common sight in Late Bays, the so-called ‘pancake’, or suitcase engine is not to be feared. Here’s how to look after your Type 4 properly.
We’re taking a look at servicing the Type 4 engine that was introduced to Volkswagen to the Bay Window range in 1973. The procedures shown here apply to all variants of the Type 4 engine, be they 1700, 1800 or 2.0 litres. The only major difference between the Type 4 series of engines is the late 2.0 litre versions use hydraulic tappets, therefore shouldn’t need periodic tappet adjustment. To find out if this applies to your Bus, check the engine code and refer to your trusty manual to see whether or not you have an engine with hydraulic tappets. Though many Buses have had their engines changed over the years, most US-import Late Bays with fuel injection engines had hydraulic tappets, so this may help you with your judgement.
Another method of checking whether or not you have hydraulic tappets is to remove one. Unlike Type 1 (Beetle) tappets (often referred to as lifters), Type 4 tappets can be removed from the engine without a complete tear down. Simply remove the rockers and pushrods, insert a magnet on an aerial-type tool and the tappet should pull straight out. If it’s a hydraulic item, it will have a circlip and two main parts. A solid lifter will be a one-piece part. Understand?
Oil be dammed
To keep on top of things, you should service a Type 4 engine every 3000 miles – at the very least, that means the oil and filter should be changed. When it comes to tappets, I recommend they be checked every 5000 miles. If, however, you only do low mileage in your Bus, make that once every couple of years.
There is nothing particularly complicated about servicing a Late Bay Window with a Type 4 motor, although access in the engine bay can be a little tricky. However, the rewards for doing it yourself are more than just financial – you will be better acquainted with your pride and joy, and you will gain mechanical understanding of how it all works. Brucey bonus!
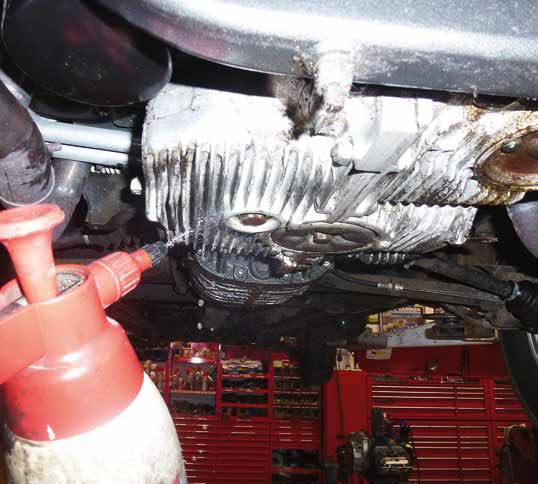
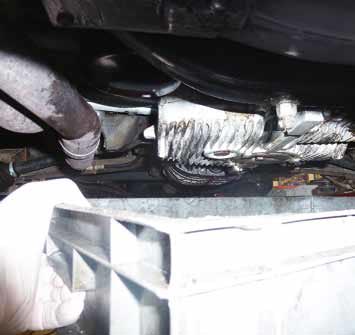
- There will probably be a mess of dirt, grime and oil at the base of your engine so, before removing the oil drain bolt, give the sump a good clean. I find brake cleaner and a stout brush works very well, but it’s a messy job.
- The old oil will be black and nasty, and is also considered carcinogenic, so be sure to wear latex gloves for hand protection and have a suitable receptacle ready for catching the oil.
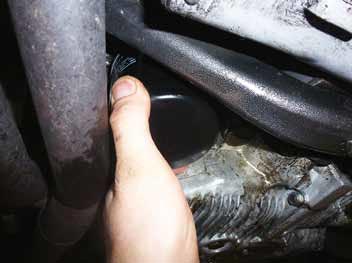
- The old oil filter is easily accessible, but the close proximity of other engine parts and a stubborn refusal to come undone means it can be tricky to remove, but some oil pump pliers will do the job.
- Again, ensure you have your oil catch tray at the ready.
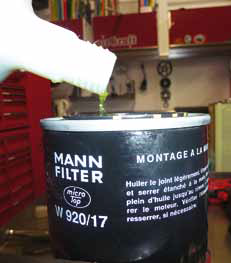
- Clean the oil filter seating area on the engine block thoroughly and then fill your new oil filter with fresh engine oil. Smear a small amount of oil onto the seal on the filter.
- Then screw the new oil filter to its home by hand. The oil filter should not be tightened with pliers or any other sort of tools as this may cause the oil seal to fail and engine damage as a result.
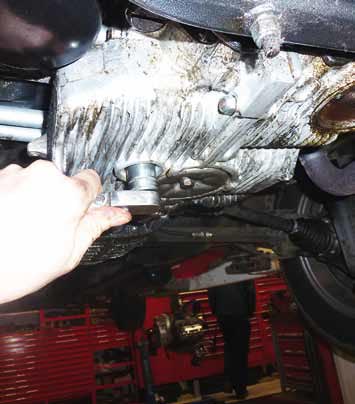
- Replace the crushable washer on the oil drain bolt with a new item and clean the seating surface thoroughly. Ensure you engage the bolt correctly by hand – turn it a good few turns before using any kind of ratchet or spanner – as a cross-threaded sump drain bolt will cause you no end of woes. Again, do not over-tighten the bolt.
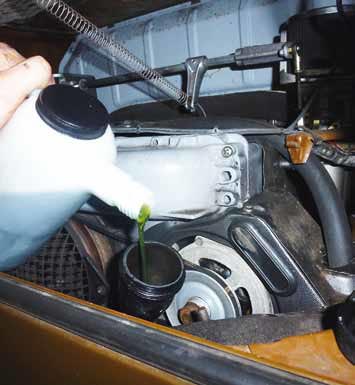
- Now top your engine up with fresh oil through the oil filler. Type 4 engines hold approximately 3.5 litres of oil, but I like to err on the safe side and add just three litres, allowing it to settle then checking the dipstick, and adding a little more at a time until the oil is at the full mark on the dipstick. Always re-check your oil level once the engine has run for a short time.
- Now it’s time for some tappet action. Tappets should only be checked with the engine stone cold, ideally the day after you last drove your Bus. The reason being a hot engine will have expanded, so the factory figures for setting the tappets will not apply.
- If you find a rocker cover stubborn to remove, a very light tap on the edge with a nylon mallet will free them off in a jiffy.
- I like to start on number one cylinder. Turn the engine over by hand so that number one cylinder is at top dead centre (TDC). An easy way to find this is to remove the distributor cap and turn the engine until the rotor arm is pointing to number 1 spark plug lead pole. The TDC mark on the crank pulley should then correspond with the ‘0’ mark on the ignition timing scale.
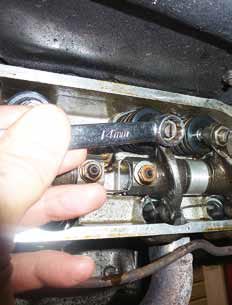
- Insert your feeler gauge into the gap where the rocker arm meets the tip of the valve. You are looking for 0.006in (0.15mm) clearance. If the clearance is too great or small, it will need adjusting.
- To adjust the tappet clearance, loosen the locking nut on the rocker, then adjust the gap by turning the screw with a flat-headed screwdriver. The clearance is set correctly when the feeler blade slides in and out of the gap with a little resistance. When you’re happy, tighten the locking nut, and then check again.
- Once you have checked/ adjusted both the inlet and exhaust valves for number one cylinder, turn the engine exactly 180 degrees anti-clockwise on the pulley. This will bring number two cylinder to TDC. Check the tappets exactly as before. Once number two cylinder is done, turn the engine another 180 degrees anti-clockwise to bring number three cylinder to TDC. Check/ adjust, then turn the engine a further 180 degrees anti-clockwise to check number four. Now repeat the check on all four cylinders.
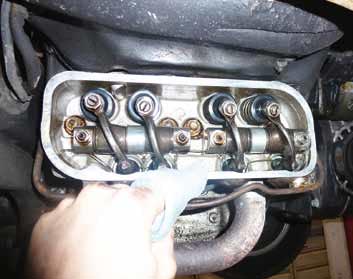
- Ensure the rocker cover and the mating surface on the cylinder head are clean and free from any trace of oil. Always use a new rocker cover gasket on each cover during re-assembly.
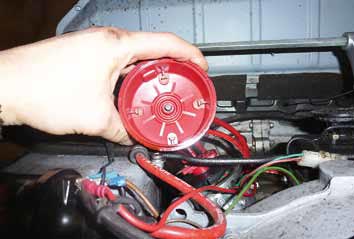
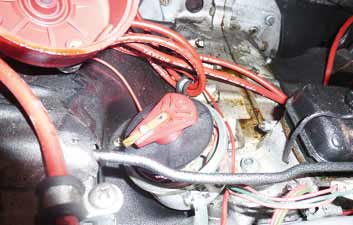
- It is a good idea to check over your ignition system as well. To do this, remove and clean/ replace your spark plugs, check/ replace your rotor arm and distributor cap if necessary and check the visual integrity of your ignition leads. Any sign of damage or cracking, they should be replaced.
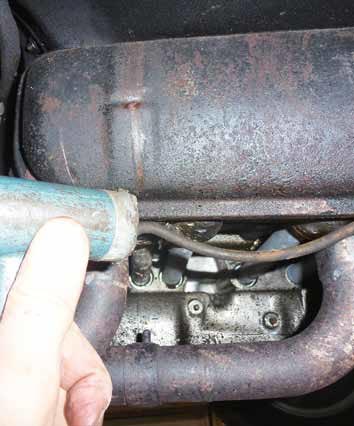
- If your engine still has points, check and adjust them with a feeler gauge (they should be between .016 and .020in (0.4-0.5mm)). However, a better bet is to fit an electronic ignition module, such as that shown here.
- Now check your ignition timing. I like to mark TDC on the front pulley as it makes it much more visible when checking with a stroboscopic timing light. I also highlight the ‘0’ mark on the timing scale.
- Check your Haynes, or other, manual for ignition timing figures specific to your engine code. If you have a performance motor, speak to your engine builder, who should advise you on your timing requirements.