Written by Mark Walker, originally published in VolksWorld magazine
Wipers running at a warp speed on a 12V-converted Split Bus is a sure sign you’re still running a 6V armature in your wiper motor. Sure, it will work, but makes the wipers worse than useless in anything which resembles damp weather. It’ll also most likely blow up your wiper motor at some point. So, if your wipers are so pointless that you use Rain-x and only see having them as a means to passing the next MoT, then it’s time to whip out the screwdrivers and do the job right with a 12V armature.
 Image credit: Mark Walker01 Remove Kick Panels and Ashtray
Sitting comfortably in the passenger seat of your Bus, remove the ashtray, as it makes visibility and access to the wiper motor easier. If you have hands like a Hobbit, you may be able to work through that hole too, whilst us manly types have to resort to going in from below. Open up the ashtray and pull upwards to get the spring clips to deflect, releasing the ashtray from its house. Resist the temptation to lever it out with anything that risks damaging the paint.
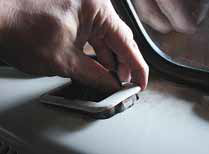 Image credit: Mark WalkerWith the ashtray removed, you can move onto the kick panels. Ours were plywood and held in place by themselves, but yours may have small screws securing them, which can be hidden so be careful not to damage them on removal.
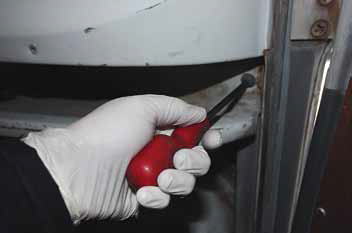 Image credit: Mark Walker
02 Move Parcel Tray to Gain Access
The next job is to move the under-dash parcel tray sufficiently to gain access to remove the wiper motor. To be honest, the job would be much easier with the tray completely removed, but this can be a ball ache, so we opted to remove the cross-head screw in the centre and at the passenger side, allowing the parcel tray to be moved down far enough to work on the wiper motor (and get a camera in there!)
If you wish to completely remove the parcel tray, you will need to remove the driver’s side screw and the four bolts that hold the steering column bracket to the underside of the parcel tray, which usually have 13mm heads.
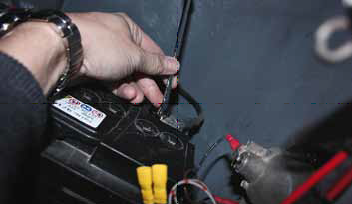 Image credit: Mark Walker
03 Undo Battery, Remove Wires from Wiper Motor
As with any electrical based procedure, you should disconnect the earth connection from the battery for safety purposes. Forget this vital step and you could be left with, at best, a lot of burned wiring that needs replacement. At worst, a burned out shell of a Bus. We are speaking from past experience here …
You will need a 13mm spanner to loosen the earth strap on the battery, which is accessed inside the engine bay, usually to the right of the engine. With this done, you can remove the wires from the wiper motor – ours just had one wired, but there are lots of differences on different year Buses. If you think you will forget where they go, then take a minute to snap some pictures, or draw a quick diagram on the back of a Subway napkin (other fast food chains are available).
Carefully remove the blade connectors with your fingers, taking care not to slice them open – your fingers that is. If the connectors are stubborn, try using a pair of long nose pliers. If your Bus is pre-’61, you will probably be faced with screw terminals instead of the blade type shown here.
 Image credit: Mark Walker04 Undo Wiper Linkage
The wiper linkage on pre-’66 Buses is a series of small clip-on balljoints, as pictured, and the wiper motor can be removed on its own, leaving the wiper spindles in place. For 1966 and 1967 Buses, you will have to remove the wiper arms, then remove the 14mm nuts holding the wiper assembly into the bus.
On the ’63 Bus we were working on, it was thankfully the earlier type, so we just needed to carefully pry the balljoints apart. On our motor there was a fixed linkage rod to the driver side, with a ball on it for the passenger side rod to be attached to. With the driver side rod unclipped from the spindle and the passenger side rod unclipped from the back of the motor, it is free to be carefully removed.
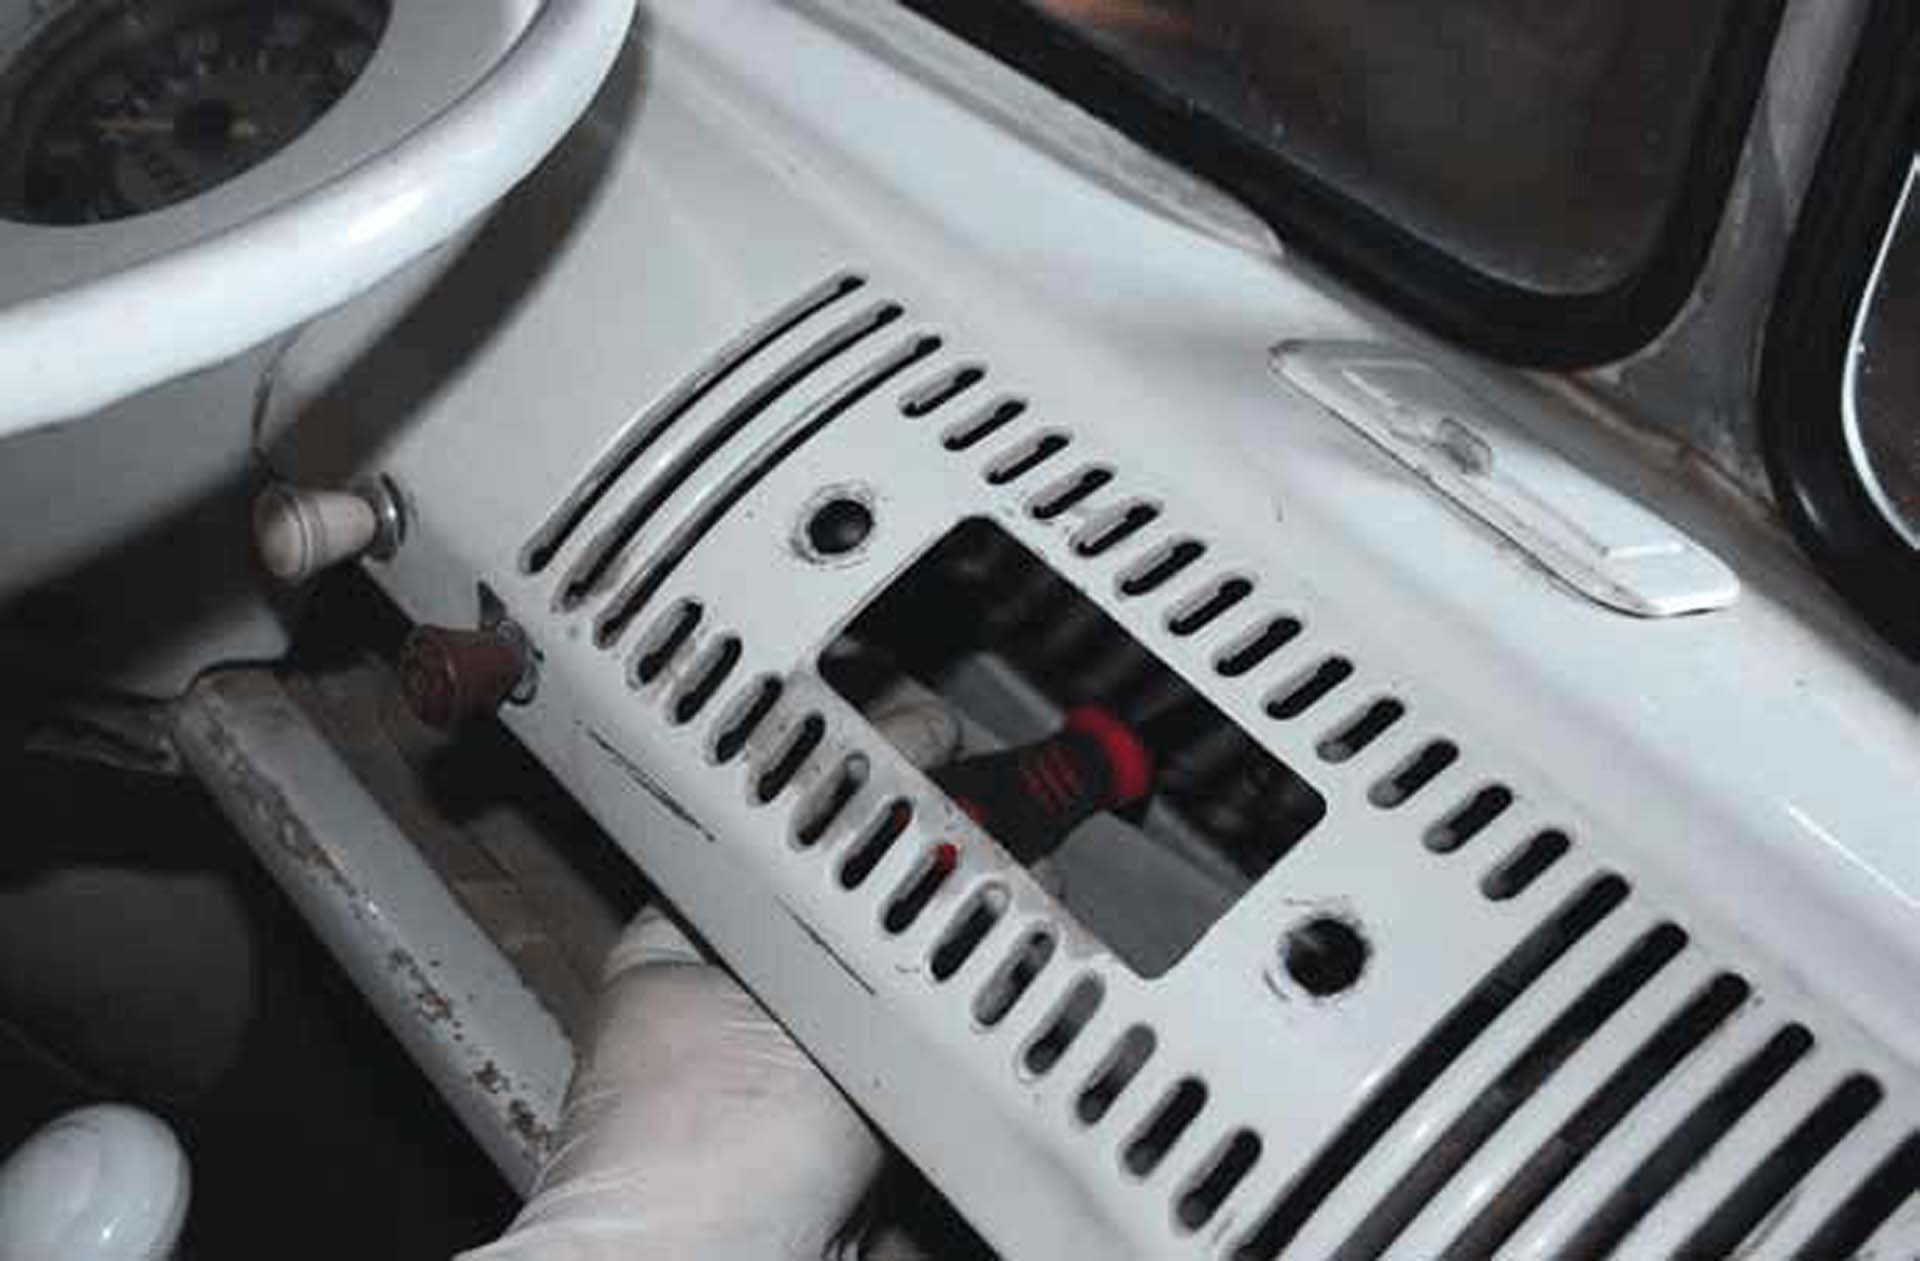
05 Unscrew Wiper Motor from Dash
With the electrical and linkage connections taken care of, the wiper motor is ready to be withdrawn from  Image credit: Mark Walkerthe dash. The motor is held in place with two screws, one on each side. Using a flat-head screwdriver, these screws can now be removed. Despite the Bus we were working on being in a dry climate most of its life, these screws were seized and a real pain to remove. We used copious quantities of WD40 and took it slow, turning the screws out a small amount, then back in. Tightening and loosening the screws like this will clean out the threads, making it easier to undo them a little more each time.
With the screws finally removed, the wiper motor could be carefully drawn out and down, making sure to account for the attached linkage rod. Now it’s time to go in the warm, put the kettle on and make a mess of the kitchen work top.
 Image credit: Mark Walker
06 Remove Wiper Motor Cover
With a nice cup of tea to hand and with fingers thawed out, look at the wiper motor in front of you (probably best to put it on some newspaper if you’re worried about backlash from a significant other). You will need to unclip the cover and pull the cover up and off the motor. To do this, you can normally just use your fingers to push the securing clip over one of the dimples and slide it clear, loosening the cover. If your cover still has the small rubber seals between the cover and motor, then be very careful with them. If not, you have probably just found the source of a very annoying resonance under the dashboard when your Bus is in motion.
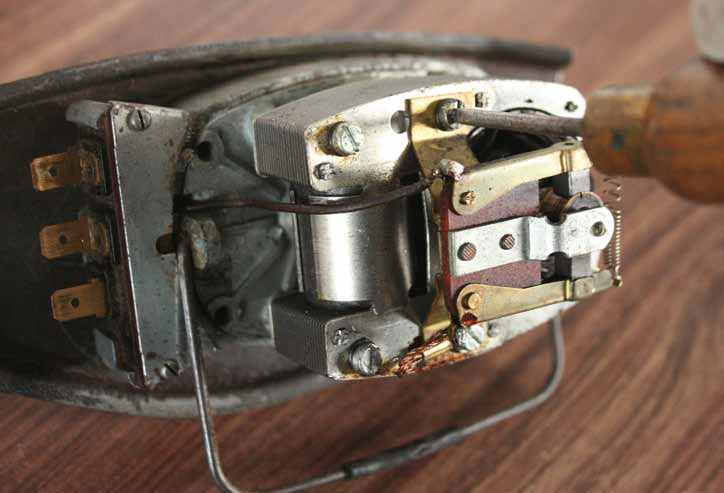 Image credit: Mark Walker07 Remove Armature, Re-Fit New One
With the cover removed and the exposed motor in front of you, you should be able to see the armature. To get the armature out of the motor is a pretty simple process. First, you need to remove the part with the brushes in that contact onto the armature itself. Using a small flat screwdriver, undo both screws and gently draw the brushes off the armature. Be very careful with the soldered electric contacts here as you gently move this part out of the way.
With this done, simply grab the armature and withdraw it. You will 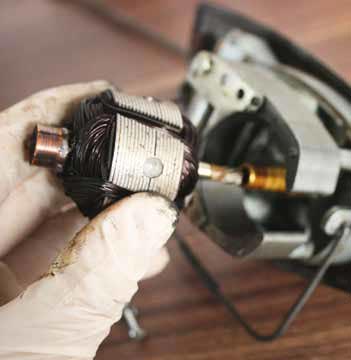 Image credit: Mark Walkerfeel a little resistance, due to the magnetic field. At this point, with the old armature removed and the new on ready to slide in it, it is prudent to remove the caked-on, 50 year old grease and apply some fresh light grease to the area, before pushing the new armature home.
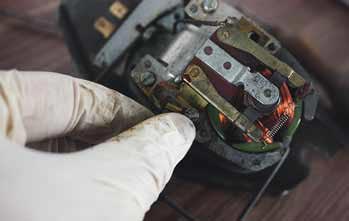 Image credit: Mark Walker
08 Re-Assemble Wiper Motor
With the new armature in place, you are on the home straight. Gently manipulate the sprung brushes around the new armature, before screwing the contact plate into place, remembering the earth wire under one screw. With this in place, you can re-fit the cover. Remember the seals, if present, otherwise you will drive yourself mad with the ensuing noise from now on. Slide the cover down into position, the notches in the covers going around the securing clip at each end. With the cover in position, slide the clip back over the top until it locks in the centre.
09 Re-Fit Wiper Motor
 Image credit: Mark Walker
Okay, so time to get your coat back on and head out to the Bus. You did remember to actually drink the tea you made, right? Sitting back in the passenger seat, you need to slide the linkage bar, which is attached to the motor, through the centre of the heater Y section and gently slide the motor into place. As you do this, check the linkage rod is not going to get hung up on any wiring or washer hose. Do this before you bolt the motor into position. Happy? Good, then let’s proceed.
Now you need to get both of the securing screws started into their respective holes. If you’re lucky (as we were) then at least one of the screws will be held by a rubber grommet, making it easier to start without the risk of dropping it. With both screws started, re-fit the linkage arms, just in case you missed some obstacle in the way. The linkage arms simply clip into position once you have everything aligned right, but can require strong fingers. If you struggle, light pressure with some pliers can help, but try not to bend anything or bugger it up, okay?
10 Tighten Screws, Re-Attach Wiring
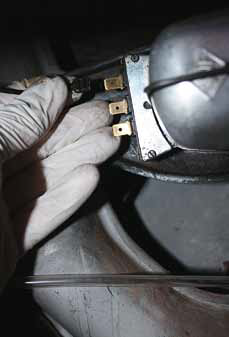 Image credit: Mark WalkerWith everything re-attached and you’re happy that the linkage will clear its surroundings, once in operation, you can now tighten the screws with your flat screwdriver.
With this done, re-attach the wires in their correct locations, referring to the photographs you took or handy napkin diagram you made earlier. With this done, you are now ready to re-attach the battery earth strap.
 Image credit: Mark Walker
11 Re-Fit Parcel Tray and Kick Panels
 Image credit: Mark WalkerBefore you put everything back together, it might be an idea to power up the wiper motor and check everything functions as it should. You should be rewarded for you efforts with a wiper motor that now
runs slow enough to a) clear at least some of the water from the ‘screen (s) and b) not cause anxiety. Happy? Of course you are!
Okay, remember to turn off the ignition now. With this done, you can re-fit the parcel tray. If you are a badass and managed to do the job by just lowering the tray down a little, you will be rewarded now as it will be a cinch to put back together. If not, and you took the whole thing out, have some Elastoplast on hand for your knuckles …
With the shelf re-fitted and your knuckles cleaned and patched up, it only remains to re-fit the kick panels and you are done. Of course, now you have wipers that function well, you can be sure it won’t rain for a while. Finish.