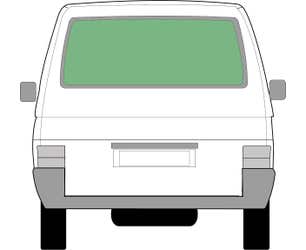
How to Fit  Just Kampers Side Glass

How to Fit Just Kampers Side Glass

Written by the JK Team
Published 12 November 2020
Just Kampers

JK’s Step-by-Step Guide to Fitting Window Glass in Your Van

Whether you’ve just received your new campervan windows, or you’re checking how they’re fitted before you buy them, this quick guide will give you a solid understanding of how to fit windows to your camper.

You can also watch our how-to video about fitting window glass, which is available below. Click here to watch the video over on YouTube.

Preparation and Initial Steps

Inspect the Delivery:
Upon receiving your glass, check for any damage and verify that it is correct for your vehicle. If you’re unable to check the contents of your delivery before signing for it, then please sign it as Contents Not Checked.
It’s also a good idea to hold onto the cardboard box as it may be needed later during the installation!

Check Window Orientation:
Ensure that the writing on the glass is the right way up when fitted. This prevents installing a nearside window on the offside, or vice versa. If you’ve got an issue with the glass you’ve received, or you’ve got any questions, then get in touch with the JK Team at sales@justkampers.co.uk or on 01256 86 22 88

Prepare Your Vehicle:
Clean your van thoroughly, and make sure it’s properly dry before masking up the vehicle to protect it from sparks, which can damage paint and interiors.
Do not mask the tailgate or rear doors shut, as access is needed.


Cutting and Removing the Panel

Drill Marker Holes:
From inside the van, drill marker holes in each corner of the window area. You can use the structure of your vehicle’s bodywork as a guide to show you where you’ll be cutting, as explained in our how-to video on YouTube.
You may find you need to remove elements of the interior before you do this, so make sure you hold on to any of the clips which you remove so you can put the interior parts back later!

Mark Cutting Lines:
Again from the inside, draw straight lines connecting the marker holes you just drilled. These will be the guide for cutting through the inner straighteners and making sure that your window fits correctly.

Cut the Panel:
Using a 1mm thick 'slitting' disc, cut along the marked lines from the outside, joining the drilled holes.
You can then follow this up with a jigsaw for more precision, ensuring that the cut panel falls inside the vehicle to prevent scratching the exterior.

Remove and Tidy Up:
Carefully remove the cut panel, and then use a flat and half-round file or a de-burring tool to smooth the edges and tidy up corners.


Fitting the Glass

Clean and Prime the Area:
Clean the panel work with alcohol wipes. If you got a window fitting kit with your glass, you’ll find these (and everything else you’ll need) as part of that kit.
Apply a line of primer on the bare metal edges and on the glass, where the bonding mastic will be applied. Just remember to shake the primer bottle well before use.

Apply Bonding Mastic:
Apply a neat line of bonding mastic on the inside of the glass. For opening windows, use a thinner amount on the plastic drains to prevent blocking the drainage holes.

Position the Glass:
We recommend using window suction handles to lift and position the glass. Align it quickly, especially if fitting multiple windows on the same side. Secure the glass temporarily with masking tape, but be sure that it’s properly fixed in place before letting go or leaving it!

Adjustments and Securing:
Once the glass is positioned correctly, use additional strips of tape to hold it firmly in place. Ensure the alignment is accurate before moving on to the next step.

Final Steps:
Remove the protective masking (but not the tape holding the glass) and clean up any metal dust or debris inside the vehicle. Leave the glass taped overnight to allow the bonding mastic to set properly.
Once the glass is set, remove the remaining tape and give the glass and surrounding area a final clean.


A note on 'Dummy' Rear Windows:

If you’re fitting a set of ‘dummy’ rear windows, then the process is very similar (minus cutting a hole in your van!), but be sure to leave a break in the bottom edge of the mastic to allow expanding air to escape in hot weather.
For more details and to purchase the necessary materials, visit Just Kampers.

4 years ago